Difference between revisions of "Fascia"
Jump to navigation
Jump to search
| Line 8: | Line 8: | ||
====Removal of Front Fascia==== | ====Removal of Front Fascia==== | ||
| + | The following steps are from the 2005 Service Manual, and might not be the fastest way to remove the front fascia. There is also a video from Crossfire Repairs by Paul on YouTube that shows how to remove the front fascia, which you can find at https://www.youtube.com/watch?v=tMGm7uELfyE . | ||
| + | <br /> | ||
| + | # Raise and support the vehicle. | ||
| + | # Remove the lower splash shield retaining screws (1) and the lower splash shield (2). [[File:Front Fascia removal part 1.png|frameless]] | ||
| + | # '''Note: Left side shown, right side similar.''' Remove the left and right front fascia access panel retaining nuts and screws (1). [[File:Front Fascia removal part 2.png|frameless]] | ||
| + | # Remove access panels from the vehicle | ||
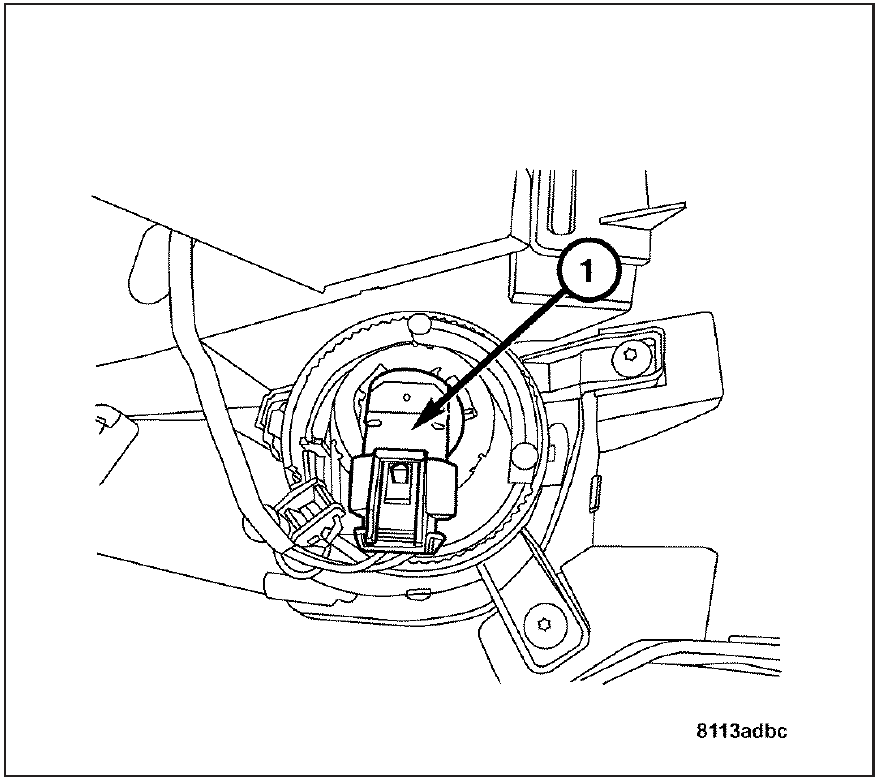
| + | # Disconnect the fog lamp wire harness connectors (1). [[File:Front Fascia removal part 3.png|frameless]] | ||
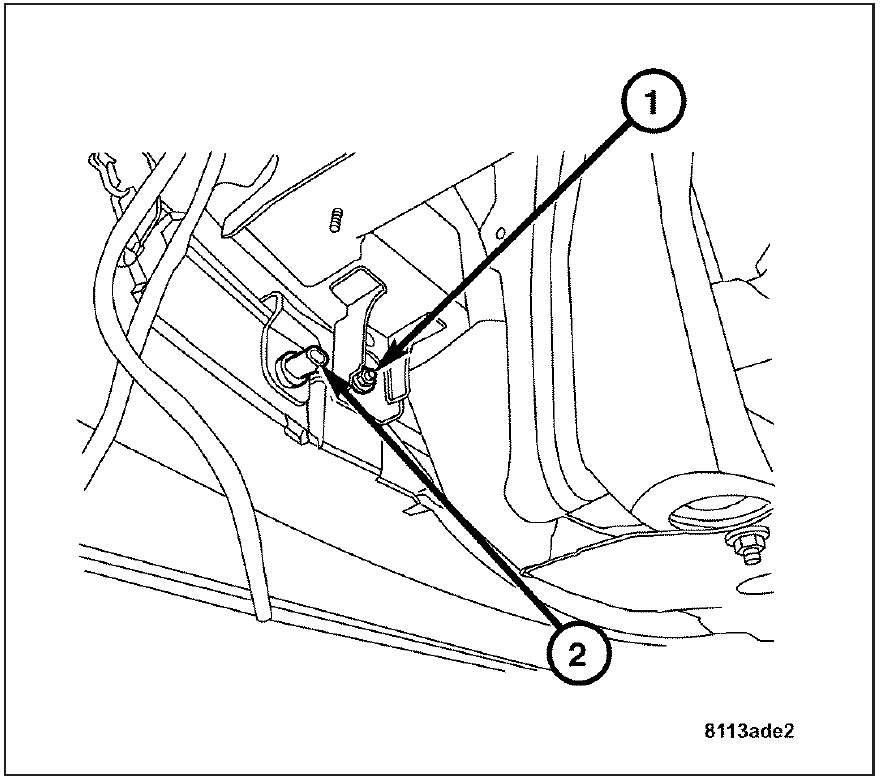
| + | # Disconnect the ambient air temperature sensor wire harness connector (2). [[File:Front Fascia removal part 4.png|frameless]] | ||
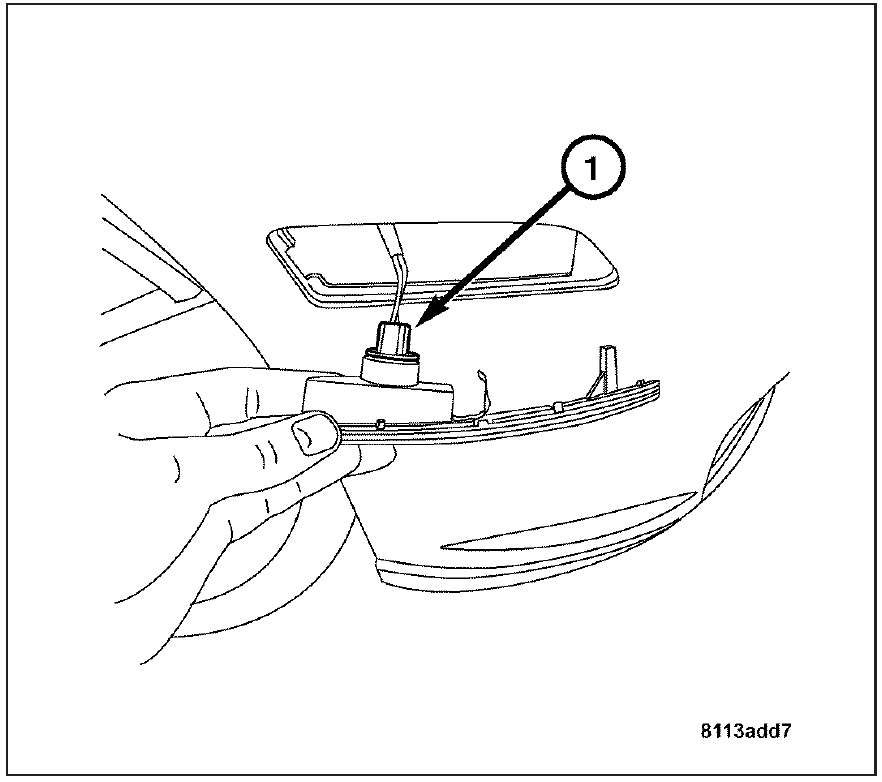
| + | # '''Note: The front marker lamp harness connector can be reached through the access hole in the inner fender well.''' Disconnect the front marker lamp wire harness connectors (1). [[File:Front Fascia removal part 5.png|frameless]] | ||
| + | # Remove the lower fascia retaining nut (1). [[File:Front Fascia removal part 4.png|frameless]] | ||
| + | # Remove the left and right front fender to fascia retaining nuts and bolts. | ||
| + | ## [todo write steps here from '23 - body/exterior/left front fender - removal'] | ||
| + | # Lower the vehicle. | ||
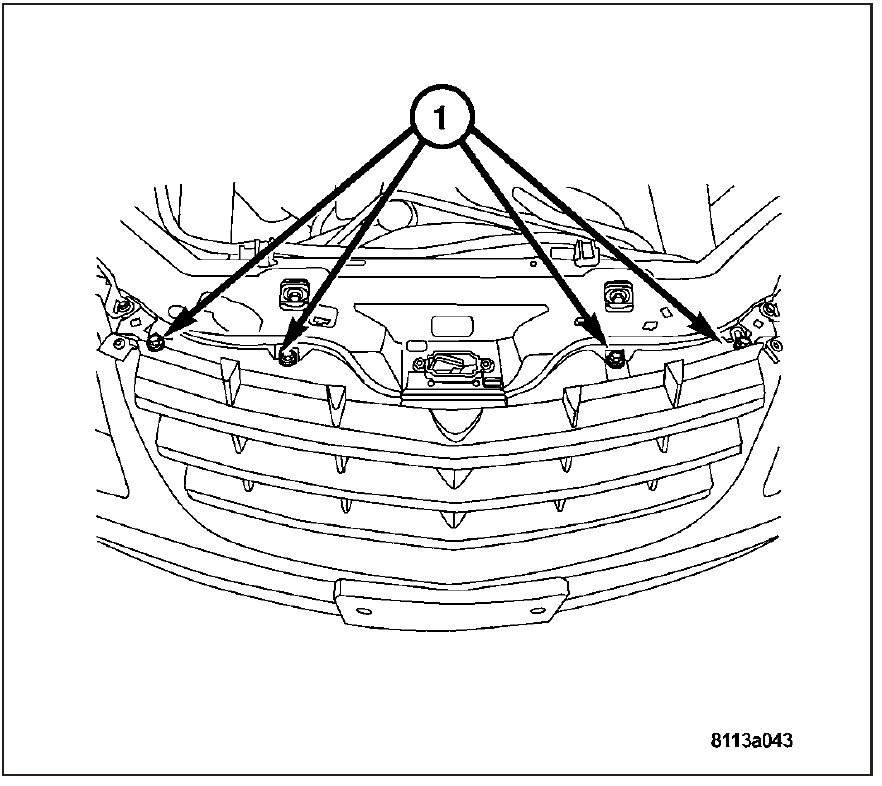
| + | # Remove the front grille assembly retaining bolts (1). [[File:Front Fascia removal part 6.png|frameless]] | ||
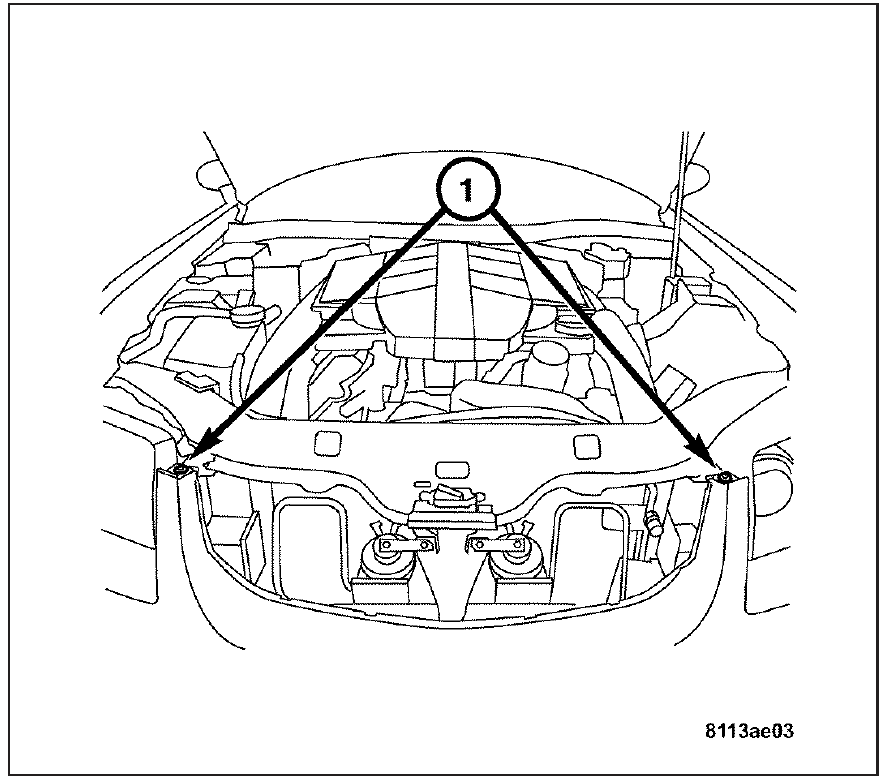
| + | # Remove the upper fascia retaining bolts (1). [[File:Front Fascia removal part 7.png|frameless]] | ||
| + | # Remove the fascia from the vehicle.<br /> | ||
===Rear Fascia=== | ===Rear Fascia=== | ||
Revision as of 11:26, 8 September 2021
Front Fascia
The SRT-6 has a different fascia compared to the regular model. It has a scoop in the lip for the intercooler radiator. Additionally, there's holes in the bottom plastic covers to provide additional airflow through the radiators.
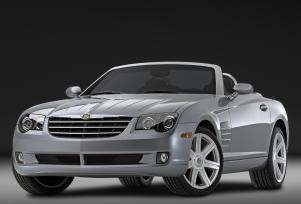
Regular front
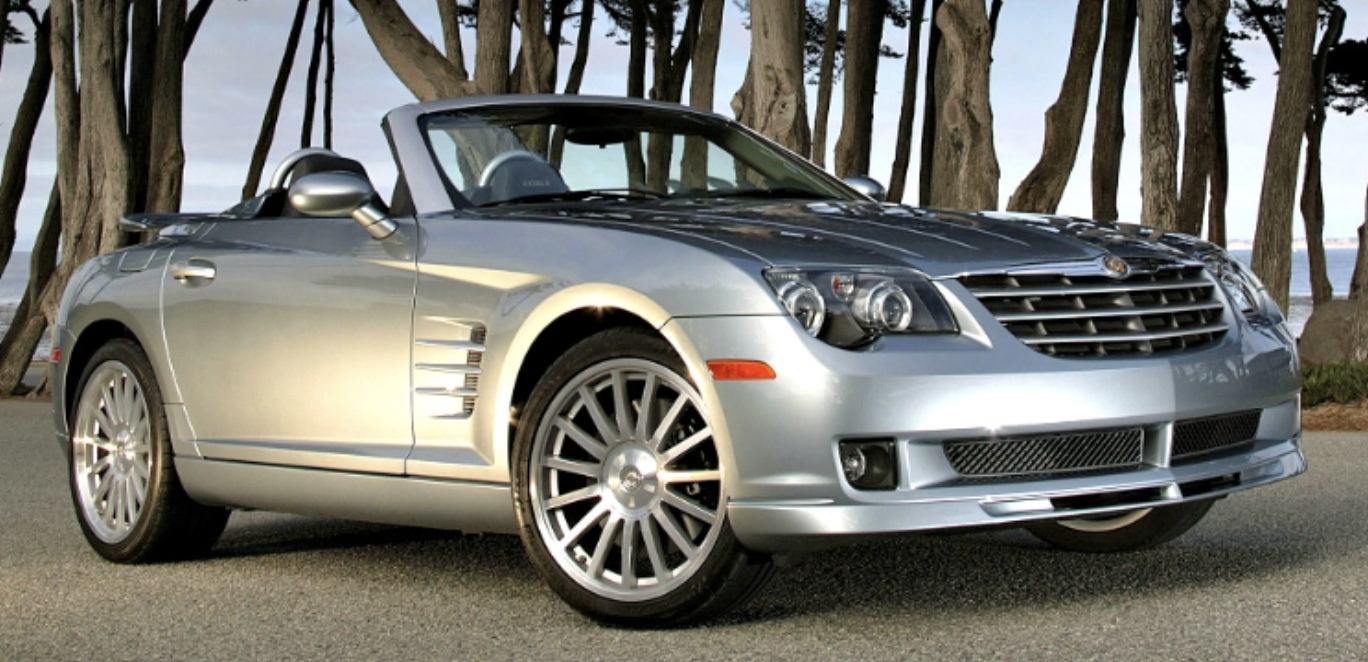
SRT-6 front


Removal of Front Fascia
The following steps are from the 2005 Service Manual, and might not be the fastest way to remove the front fascia. There is also a video from Crossfire Repairs by Paul on YouTube that shows how to remove the front fascia, which you can find at https://www.youtube.com/watch?v=tMGm7uELfyE .
- Raise and support the vehicle.
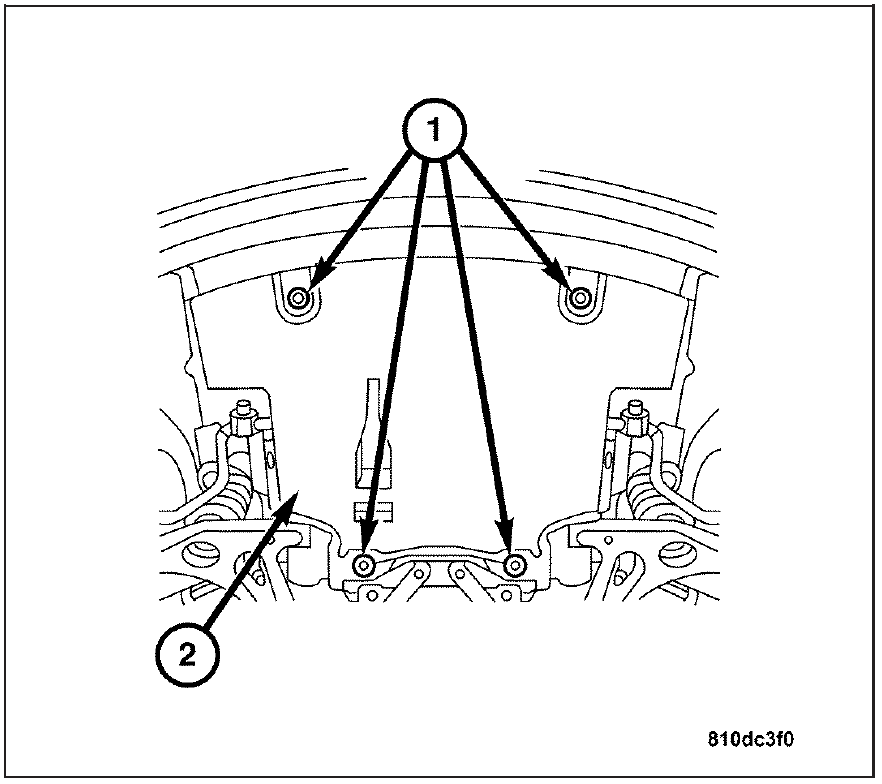
- Remove the lower splash shield retaining screws (1) and the lower splash shield (2).
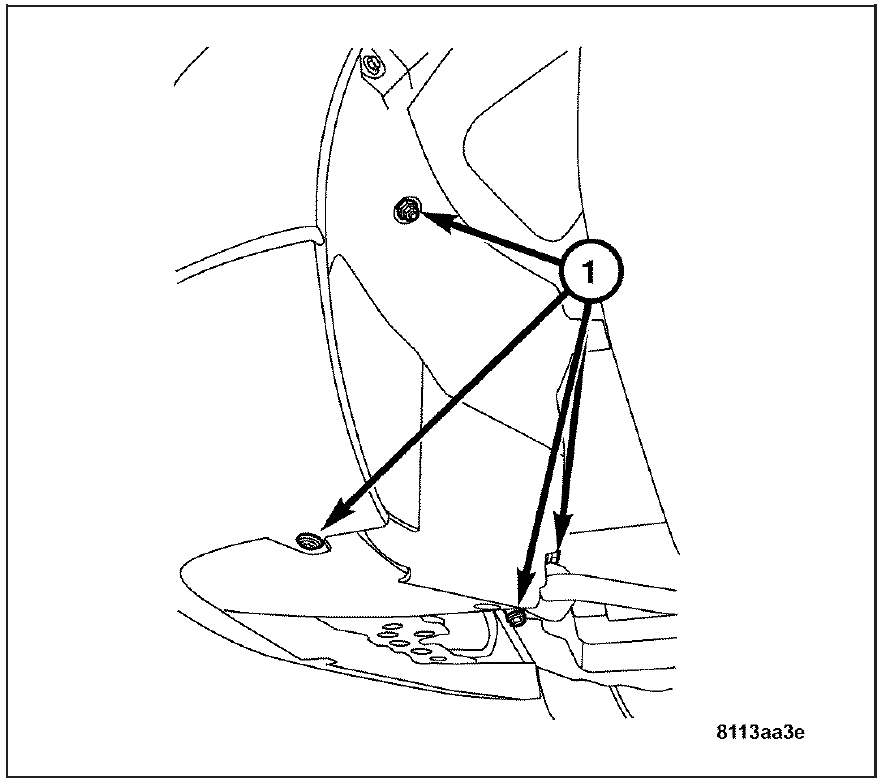
- Note: Left side shown, right side similar. Remove the left and right front fascia access panel retaining nuts and screws (1).
- Remove access panels from the vehicle
- Disconnect the fog lamp wire harness connectors (1).
- Disconnect the ambient air temperature sensor wire harness connector (2).
- Note: The front marker lamp harness connector can be reached through the access hole in the inner fender well. Disconnect the front marker lamp wire harness connectors (1).
- Remove the lower fascia retaining nut (1).
- Remove the left and right front fender to fascia retaining nuts and bolts.
- [todo write steps here from '23 - body/exterior/left front fender - removal']
- Lower the vehicle.
- Remove the front grille assembly retaining bolts (1).
- Remove the upper fascia retaining bolts (1).
- Remove the fascia from the vehicle.


Rear Fascia
Removal of Rear Fascia
The removal of the rear fascia (bumper) is rather easy. There are 15 bolts/screws to remove, explained below.
- Remove the rear fascia assembly retaining screws (1, 2, and 3).
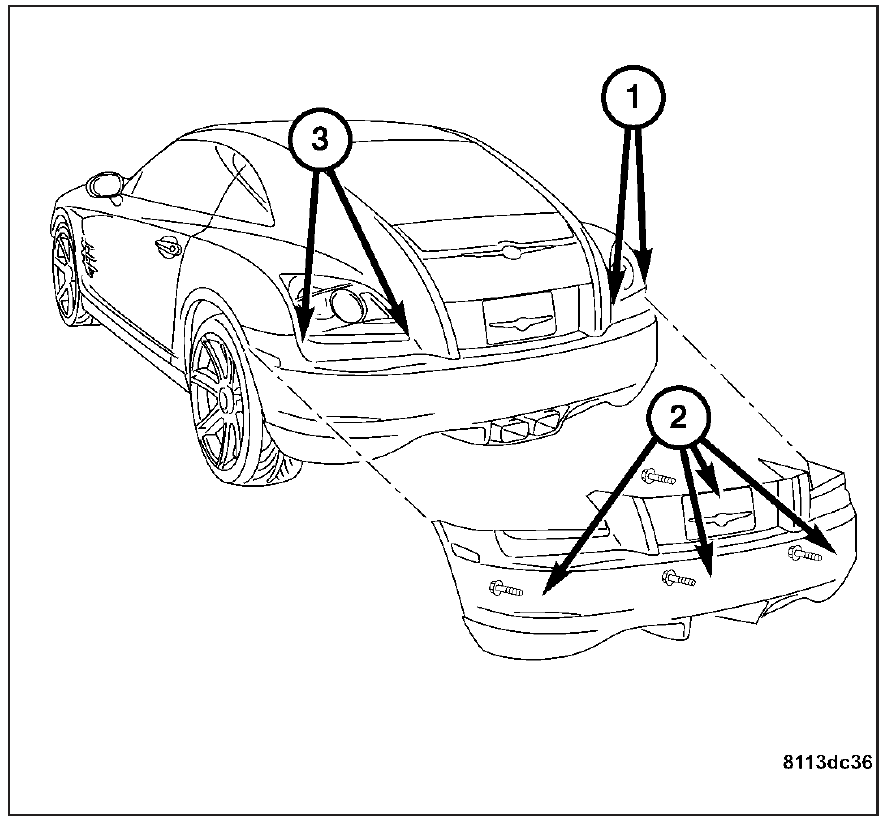
- Raise and support the vehicle.
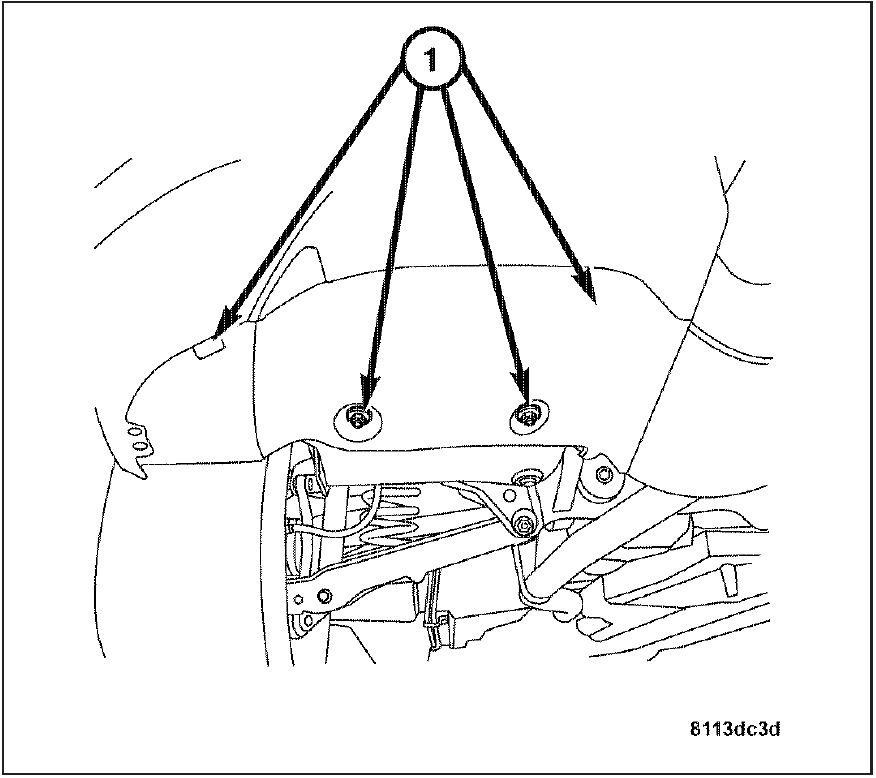
- Remove the right and left lower fascia trim retaining screws (1).
- Remove the rear fascia from the vehicle. Watch out for the side markers with lights. They should be removed before the fascia is removed.

