Difference between revisions of "Fascia"
| (5 intermediate revisions by the same user not shown) | |||
| Line 2: | Line 2: | ||
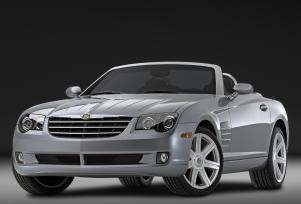
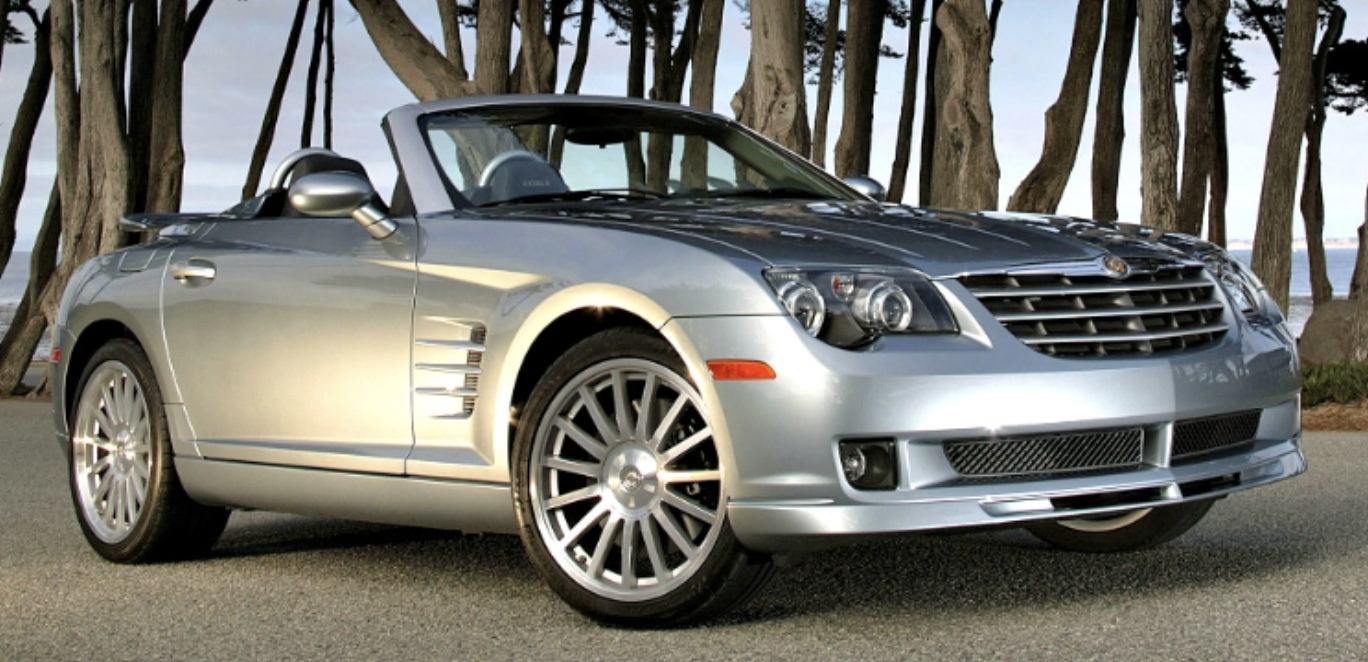
The SRT-6 has a different fascia compared to the regular model. It has a scoop in the lip for the intercooler radiator. Additionally, there's holes in the bottom plastic covers to provide additional airflow through the radiators. | The SRT-6 has a different fascia compared to the regular model. It has a scoop in the lip for the intercooler radiator. Additionally, there's holes in the bottom plastic covers to provide additional airflow through the radiators. | ||
| − | <br /><gallery mode="packed"> | + | <br /><gallery mode="packed" heights="120"> |
File:2004 crossfire roadster.jpg|Regular front | File:2004 crossfire roadster.jpg|Regular front | ||
File:SRT-6 Roadster front.png|SRT-6 front | File:SRT-6 Roadster front.png|SRT-6 front | ||
| − | </gallery> | + | </gallery> |
| + | |||
| + | ====Removal of Front Fascia==== | ||
| + | The following steps are from the 2005 Service Manual, and might not be the fastest way to remove the front fascia. There is also a video from Crossfire Repairs by Paul on YouTube that shows how to remove the front fascia, which you can find at https://www.youtube.com/watch?v=tMGm7uELfyE . | ||
<br /> | <br /> | ||
| + | {| class="wikitable" | ||
| + | |1 | ||
| + | |Raise and support the vehicle. | ||
| + | | | ||
| + | |- | ||
| + | |2 | ||
| + | |Remove the lower splash shield retaining screws (1) and the lower splash shield (2). | ||
| + | |[[File:Front_Fascia_removal_part_1.png|alt=|thumb]] | ||
| + | |- | ||
| + | |3 | ||
| + | |'''Note: Left side shown, right side similar.''' | ||
| + | Remove the left and right front fascia access panel retaining nuts and screws (1). | ||
| + | |[[File:Front_Fascia_removal_part_2.png|alt=|thumb]] | ||
| + | |- | ||
| + | |4 | ||
| + | |Remove access panels from the vehicle | ||
| + | | | ||
| + | |- | ||
| + | |5 | ||
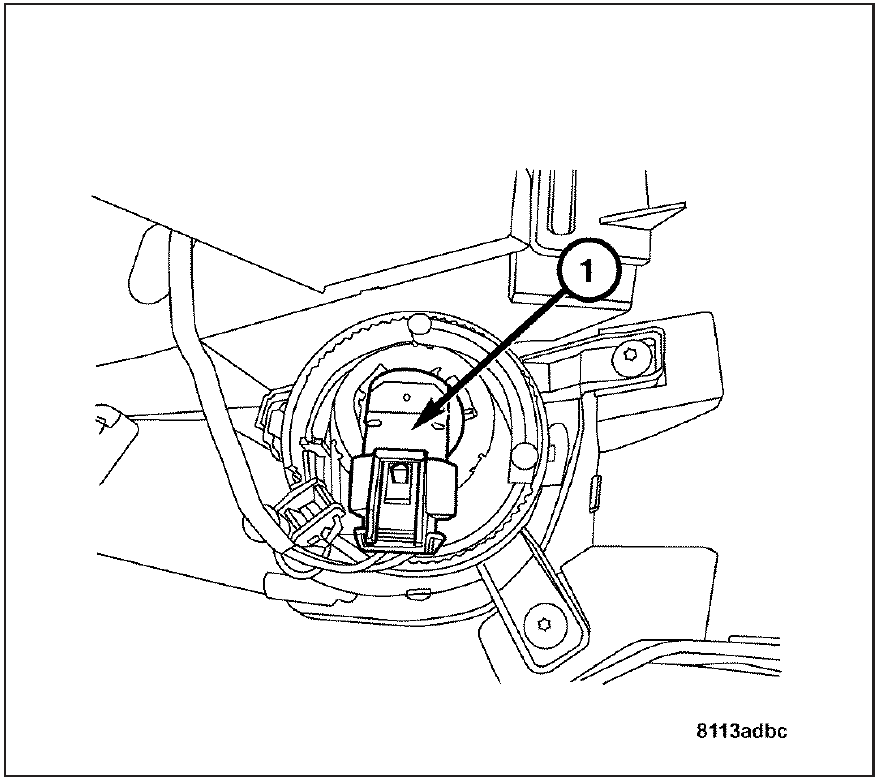
| + | |Disconnect the fog lamp wire harness connectors (1). | ||
| + | |[[File:Front_Fascia_removal_part_3.png|alt=|thumb]]<br /> | ||
| + | |- | ||
| + | |6 | ||
| + | |Disconnect the ambient air temperature sensor wire harness connector (2). | ||
| + | |[[File:Front_Fascia_removal_part_4.png|alt=|thumb]]<br /> | ||
| + | |- | ||
| + | |7 | ||
| + | |'''Note: The front marker lamp harness connector can be reached through the access hole in the inner fender well.''' | ||
| + | Disconnect the front marker lamp wire harness connectors (1). | ||
| + | | | ||
| + | |- | ||
| + | |8 | ||
| + | |Remove the lower fascia retaining nut (1). | ||
| + | |[[File:Front_Fascia_removal_part_4.png|alt=|thumb]]<br /> | ||
| + | |- | ||
| + | |9 | ||
| + | |Remove the left and right front fender to fascia retaining nuts and bolts. | ||
| + | | | ||
| + | |- | ||
| + | |10 | ||
| + | |Lower the vehicle | ||
| + | | | ||
| + | |- | ||
| + | |11 | ||
| + | |Remove the front grille assembly retaining bolts (1). | ||
| + | |[[File:Front_Fascia_removal_part_6.png|alt=|thumb]] | ||
| + | |- | ||
| + | |12 | ||
| + | |Remove the upper fascia retaining bolts (1). | ||
| + | |[[File:Front_Fascia_removal_part_7.png|alt=|thumb]] | ||
| + | |- | ||
| + | |13 | ||
| + | |Remove the fascia from the vehicle. | ||
| + | | | ||
| + | |} | ||
| + | |||
| + | ===Rear Fascia=== | ||
| + | |||
| + | ====Removal of Rear Fascia==== | ||
| + | The removal of the rear fascia (bumper) is rather easy. There are 15 bolts/screws to remove, explained below. | ||
| + | {| class="wikitable" | ||
| + | |- | ||
| + | |1 | ||
| + | |Remove the rear fascia assembly retaining screws (1, 2, and 3). | ||
| + | |[[File:Rear_Fascia_Removal_part_1.png|alt=|thumb]] | ||
| + | |- | ||
| + | |2 | ||
| + | |Raise and support the vehicle. | ||
| + | |||
| + | | | ||
| + | |- | ||
| + | |3 | ||
| + | |Remove the right and left lower fascia trim retaining screws (1). | ||
| + | |[[File:Rear_Fascia_Removal_part_2.png|alt=|thumb]]<br /> | ||
| + | |- | ||
| + | |4 | ||
| + | |Remove the rear fascia from the vehicle. | ||
| + | '''Watch out for the side markers with lights. They should be removed before the fascia is removed.''' | ||
| + | | | ||
| + | |} | ||
Latest revision as of 11:37, 8 September 2021
Front Fascia
The SRT-6 has a different fascia compared to the regular model. It has a scoop in the lip for the intercooler radiator. Additionally, there's holes in the bottom plastic covers to provide additional airflow through the radiators.
Removal of Front Fascia
The following steps are from the 2005 Service Manual, and might not be the fastest way to remove the front fascia. There is also a video from Crossfire Repairs by Paul on YouTube that shows how to remove the front fascia, which you can find at https://www.youtube.com/watch?v=tMGm7uELfyE .
| 1 | Raise and support the vehicle. | |
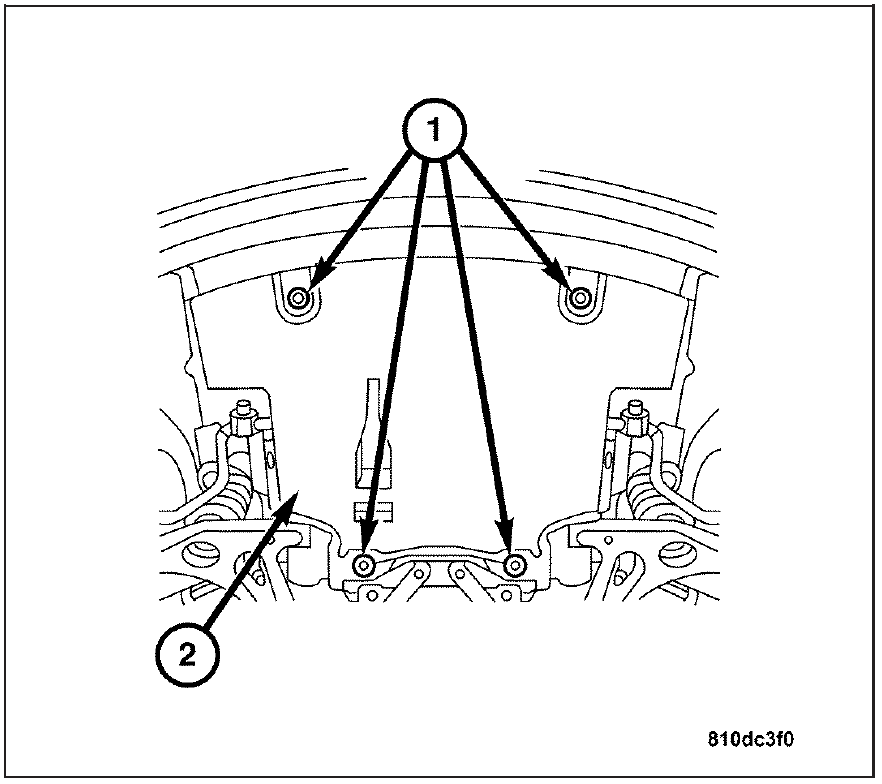
| 2 | Remove the lower splash shield retaining screws (1) and the lower splash shield (2). | |
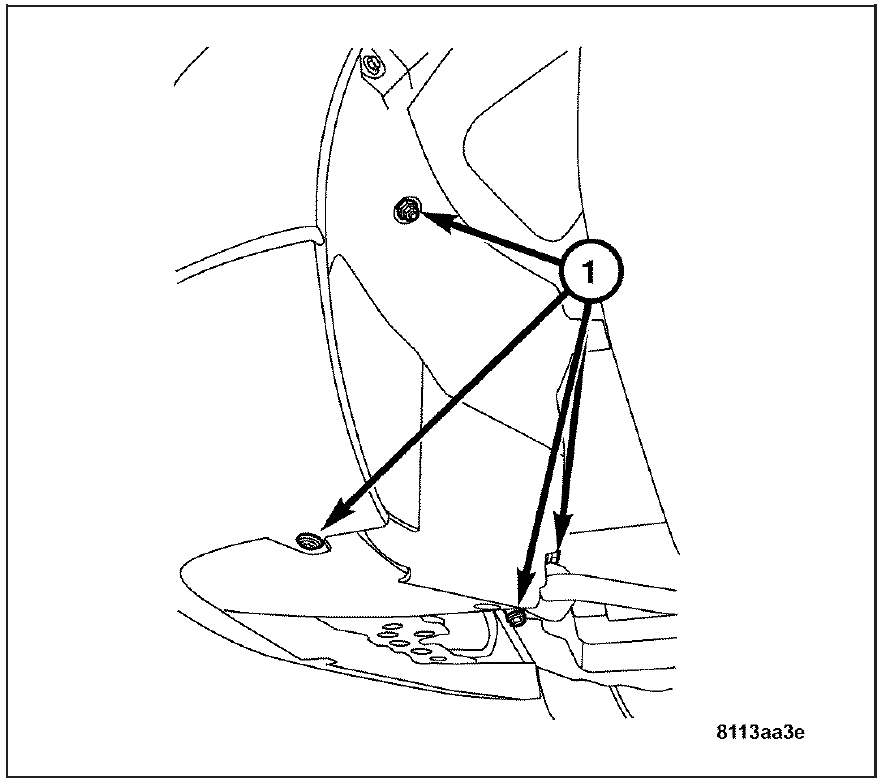
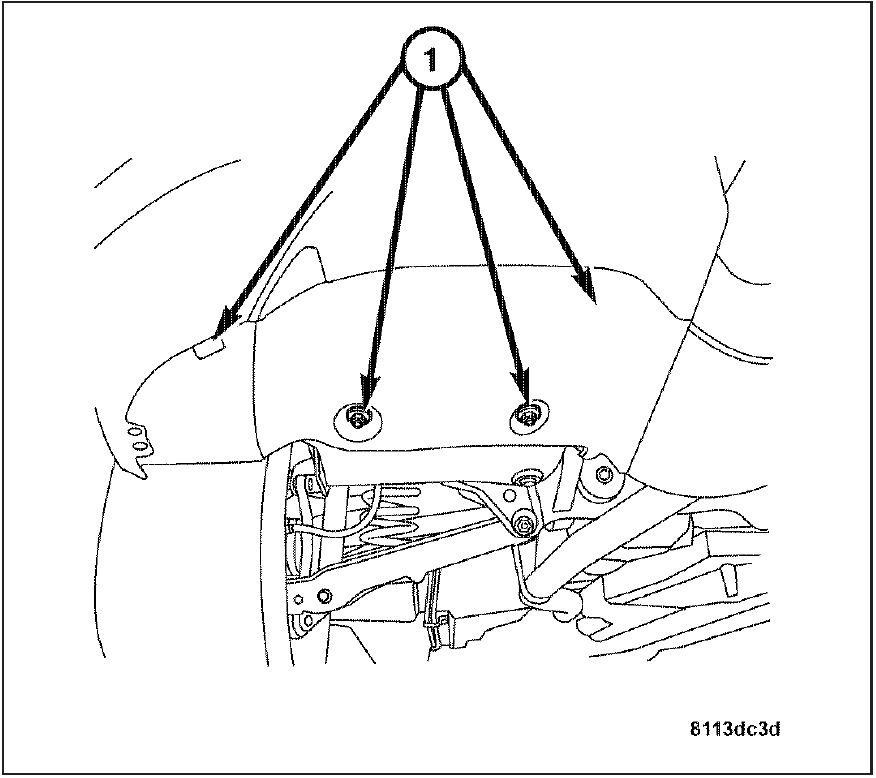
| 3 | Note: Left side shown, right side similar.
Remove the left and right front fascia access panel retaining nuts and screws (1). |
|
| 4 | Remove access panels from the vehicle | |
| 5 | Disconnect the fog lamp wire harness connectors (1). | |
| 6 | Disconnect the ambient air temperature sensor wire harness connector (2). | |
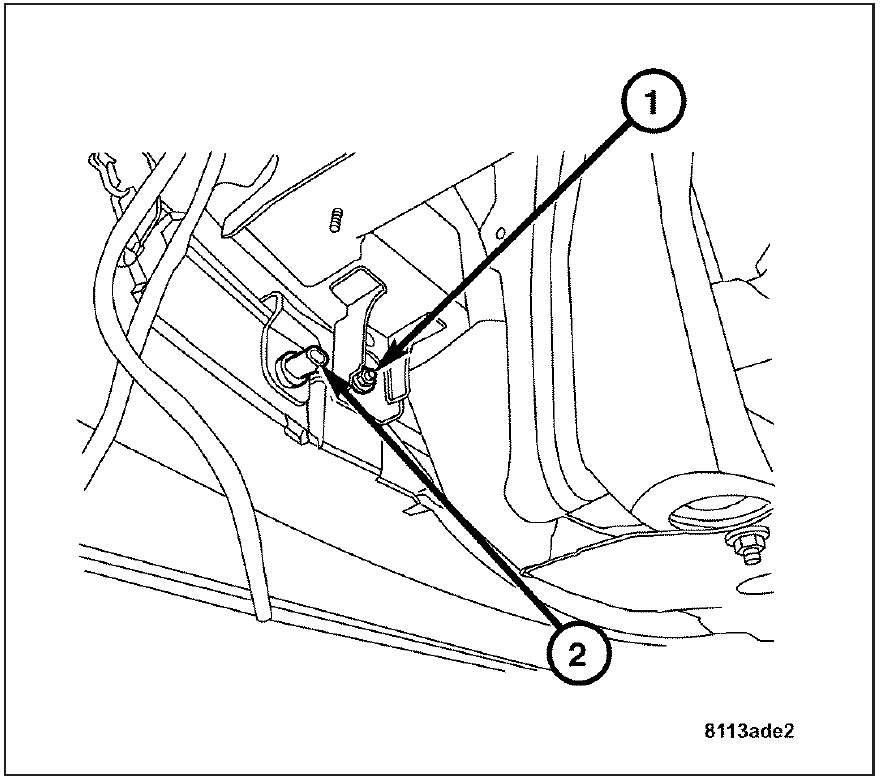
| 7 | Note: The front marker lamp harness connector can be reached through the access hole in the inner fender well.
Disconnect the front marker lamp wire harness connectors (1). |
|
| 8 | Remove the lower fascia retaining nut (1). | |
| 9 | Remove the left and right front fender to fascia retaining nuts and bolts. | |
| 10 | Lower the vehicle | |
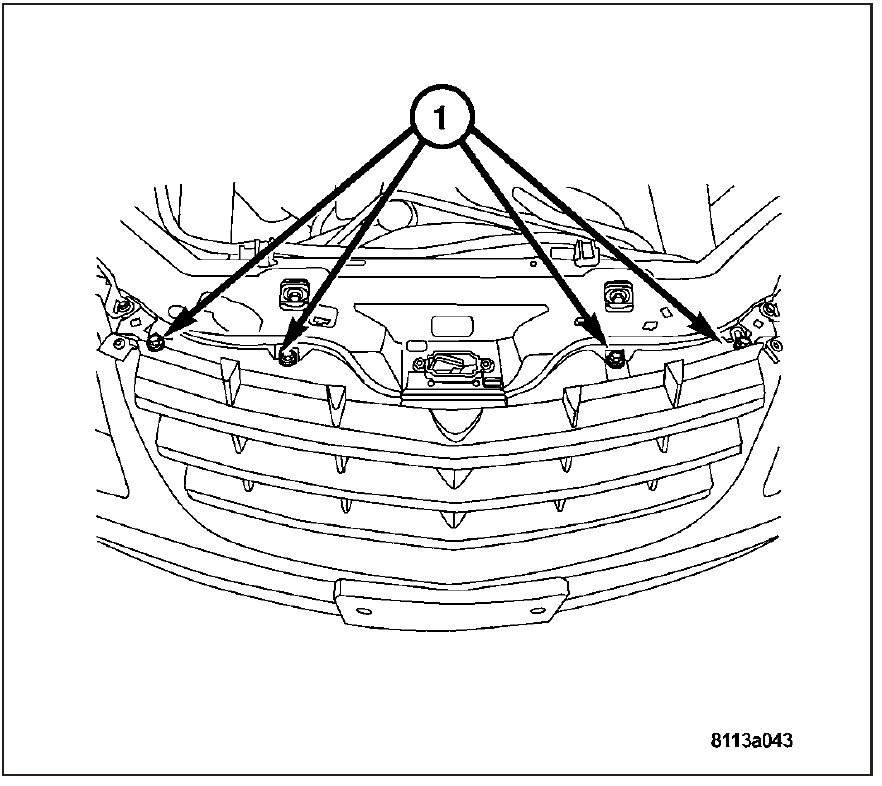
| 11 | Remove the front grille assembly retaining bolts (1). | |
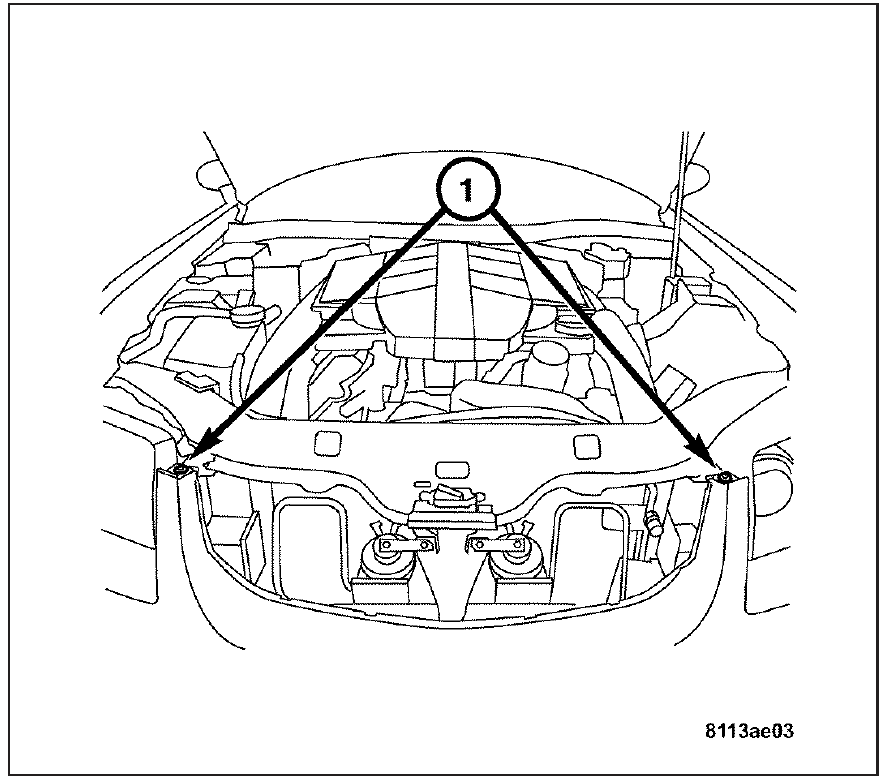
| 12 | Remove the upper fascia retaining bolts (1). | |
| 13 | Remove the fascia from the vehicle. |
Rear Fascia
Removal of Rear Fascia
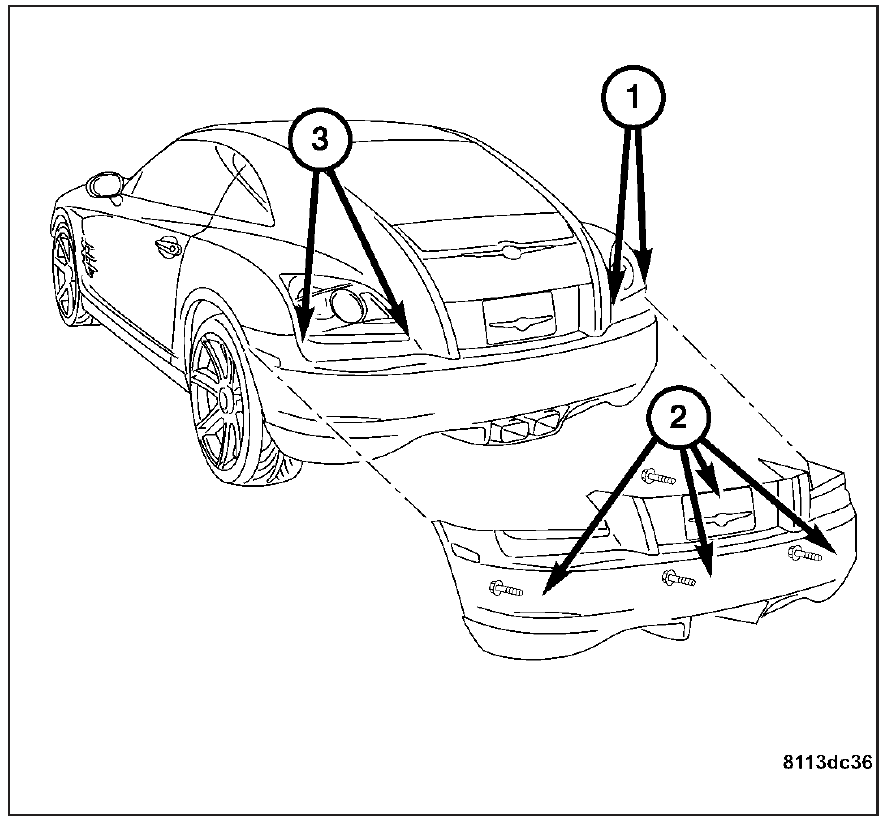
The removal of the rear fascia (bumper) is rather easy. There are 15 bolts/screws to remove, explained below.
| 1 | Remove the rear fascia assembly retaining screws (1, 2, and 3). | |
| 2 | Raise and support the vehicle. | |
| 3 | Remove the right and left lower fascia trim retaining screws (1). | |
| 4 | Remove the rear fascia from the vehicle.
Watch out for the side markers with lights. They should be removed before the fascia is removed. |
